Snapshot are good for archiving reports, or to help report performance, pre-generate reports during night to have them prepared for users. There are few was you can create and access the Snapshot, manually or from Report Processing
Schedule and access it directly like live Report or from Report History. In this post I describe the native mode of Reporting Services, standard edition of SQL Server 2014. Since new versions of Reporting Services, 2O16, 2017 there come other compatibilities with web portal. Bellow are steps you can manage snapshots in Reporting Services Report Manager.
Let’s clarify Snapshots in Report history and Snapshots in report execution first.
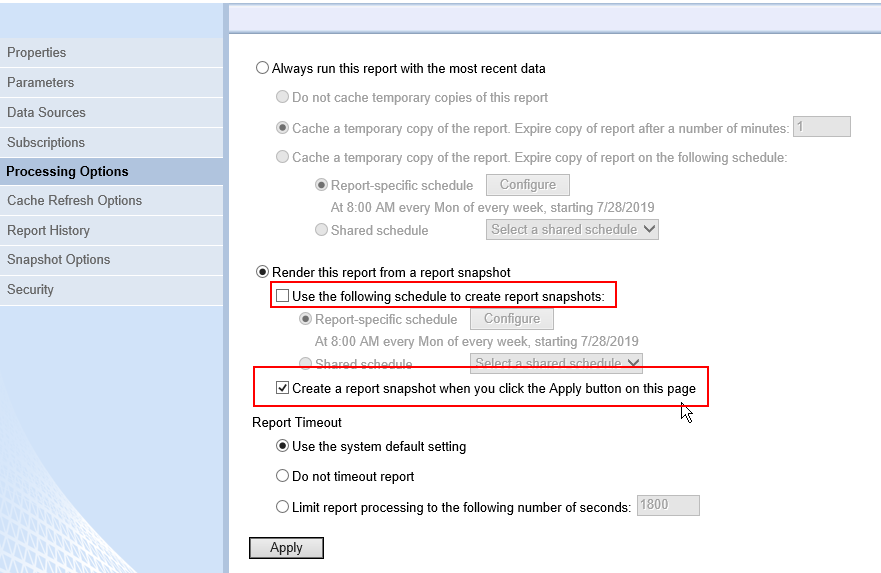
Basically, when you create report Snapshot from Report Processing Option section you will not see it in Reporting Manager by default. The snapshot can be accessed when you set the Processing settings to be that Report will be rendered from Snapshot. In this scenario you than go to the Report like live rendering of the report but it is not processed by user it is processed from snapshot. You cannot change parameters, but the big advantage is that the Report processing is very fast. In case that more snapshots exist for one report, the last valid one is taken as source.
Report history gives user possibility to have accessible snapshots as they were created during time. It good be good if you would like to have backups of your reports or have comparation of data in reports during time. Report history can be accessed to users with standard roles which are not part of Administrators.
Both type of snapshots Report history and Processing Option can be created manually or based on its Schedule.
Let’s go to look at it closer.
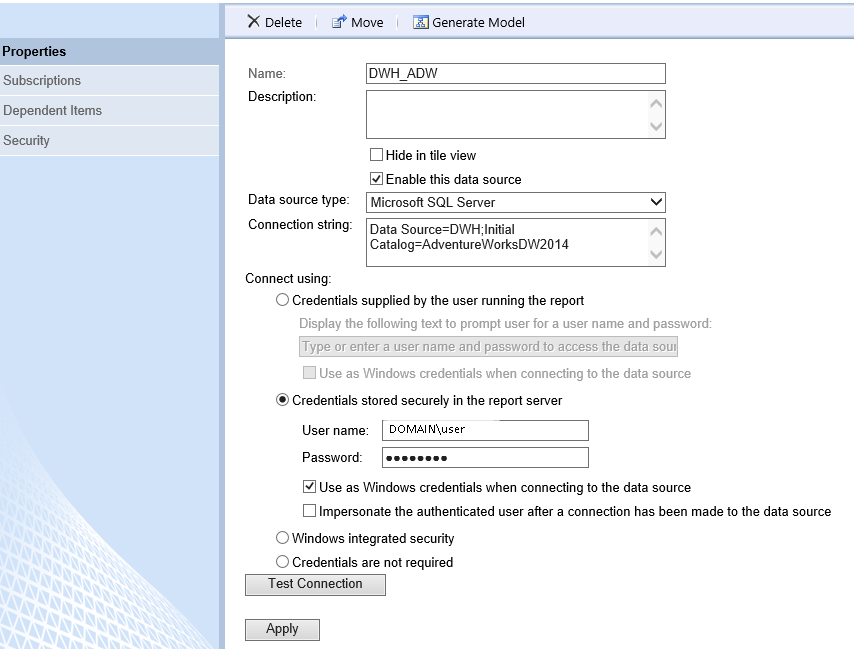
At first, be aware of one important thing, you have to store data source credentials on the server. If not, you will get error message as on picture bellow.
Following picture show how dataset should look like to allow you work with snapshots. Check Credentials stored securely in the report server and for windows credentials check Use as Windows credentials when connecting to the Data Source.
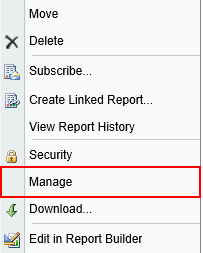
To create Snapshot, we have to go to Report properties first. Go to Report properties by click on right arrow next to the Report name.

Go to Manage section from menu.
Go to Processing Options and click on Render this report from a report snapshot. By checking this option, the report will be rendered from snapshot next time. But in case you do this for first time and snapshot does not exists in database you have to click on Create a Report Snapshot when you click the Apply button on this page, to create the snapshot.
If Snapshot will not be present in Report Server database, you get error when you try to run the report.

When you check above mentioned option and click on apply button you can see snapshot in database.
SELECT [CreatedDate]
,[QueryParams]
,[ExpirationDate]
,[PageCount]
,[HasDocMap]
,[PaginationMode]
,[ProcessingFlags]
FROM [ReportServer].[dbo].[SnapshotData] ORDER
BY createdDAte DESC

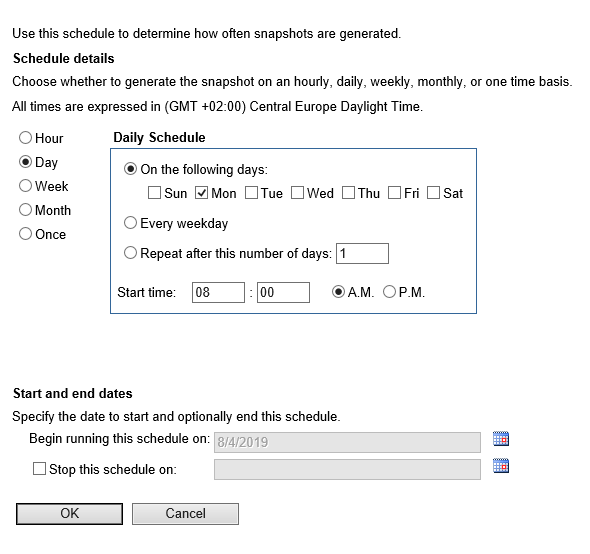
You can select the Schedule from predefined Shared Schedules (create in site settings) or define Report-specific schedule, to create schedule Report Snapshot. To set schedule, select parameters seen on picture bellow. Schedule periodicity (daily, Weekly, etc.), Start time, day list etc. You can set end day of the schedule too.
Repeat steps described at the very beginning of this post and go to Report properties, to Report history section. Here you will not see any Snapshots since no Snapshot was generated to Snapshot History.
When you would like to add new Snapshots click on button above New Snapshot. When this button is not visible you have to set it first in Snapshot Options section (under Report History section in menu).

In Report Snapshot Options you can allow above mentioned button for adding Snapshots visible.
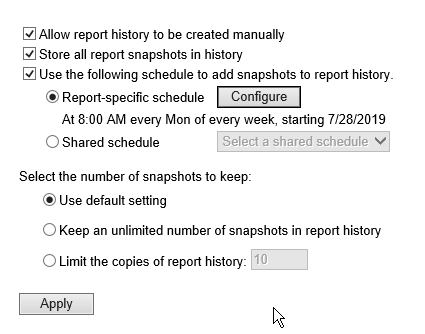
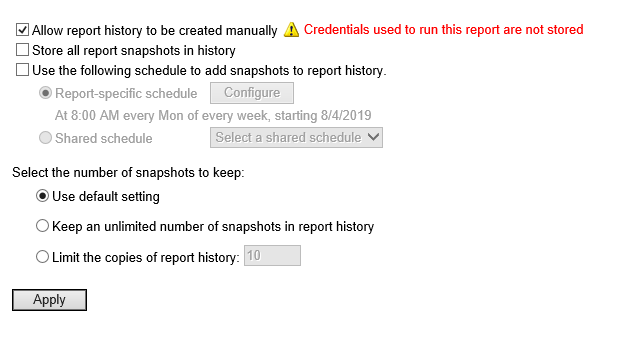
Let’s try check and uncheck Allow report history to be created manually. When unchecked you have no possibility to create snapshot in Report History manually. See picture bellow.

Store all report Snapshots in history enable functionality when each report Snapshot will be visible in Report History. When we would go at the beginning of this post and create Snapshot through Report Processing Options, we could see created snapshot in Report History.
Use the following schedule to add snapshots to report history will create new Snapshot visible in Report History based on defined Schedule.
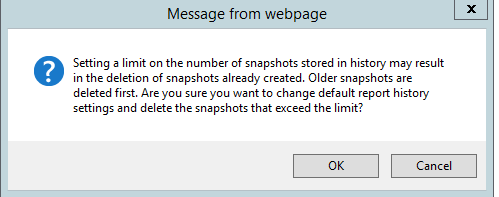
In this section you can limit number of stored Snapshots. If any already exists system warns you that some of them could be deleted already.
More detailed info could be found here:
https://bit.ly/2KfMpTx
